
In one of my late-night Pinterest binges recently, I saw the the cutest little “cactus pots” made from hard boiled eggs. To be fair, I have to give credit to the original site they came from, called Quartz and Leisure. She has a beautiful site, check it out!
But I loved these so much, I wanted them to be on my table all spring long! Sooooooooo I decided to make them more permanent, by using Paper Mache eggs instead, and painting them. So I ordered a set of paper mache eggs:
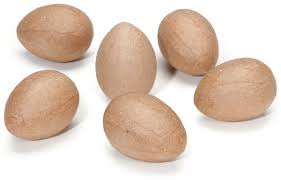
Paper Mache Eggs-Amazon-$4.97/6
And then I headed over to Dollar Tree and was able to get:
Clay Pots
Floral Foam
Rocks
Tissue Paper (I chose dark and light pink, but it’s your choice!)
You also need:
Craft Paint, whatever colors you want (You can get these at any craft store)
A fine-point black Sharpie
Hot glue gun
Paint brushes or foam brushes
After my eggs arrived, the first step was to paint them. You don’t want them to roll and get stuck on your painting surface, so I used some plastic shot glasses to balance them on….
It took a few coats, so once each coat dried I turned the egg, painted, then let dry again. Next came drawing the little needles on. I did a combo of x’s turned two different ways, some check marks, and also some z’s in lines going down each egg….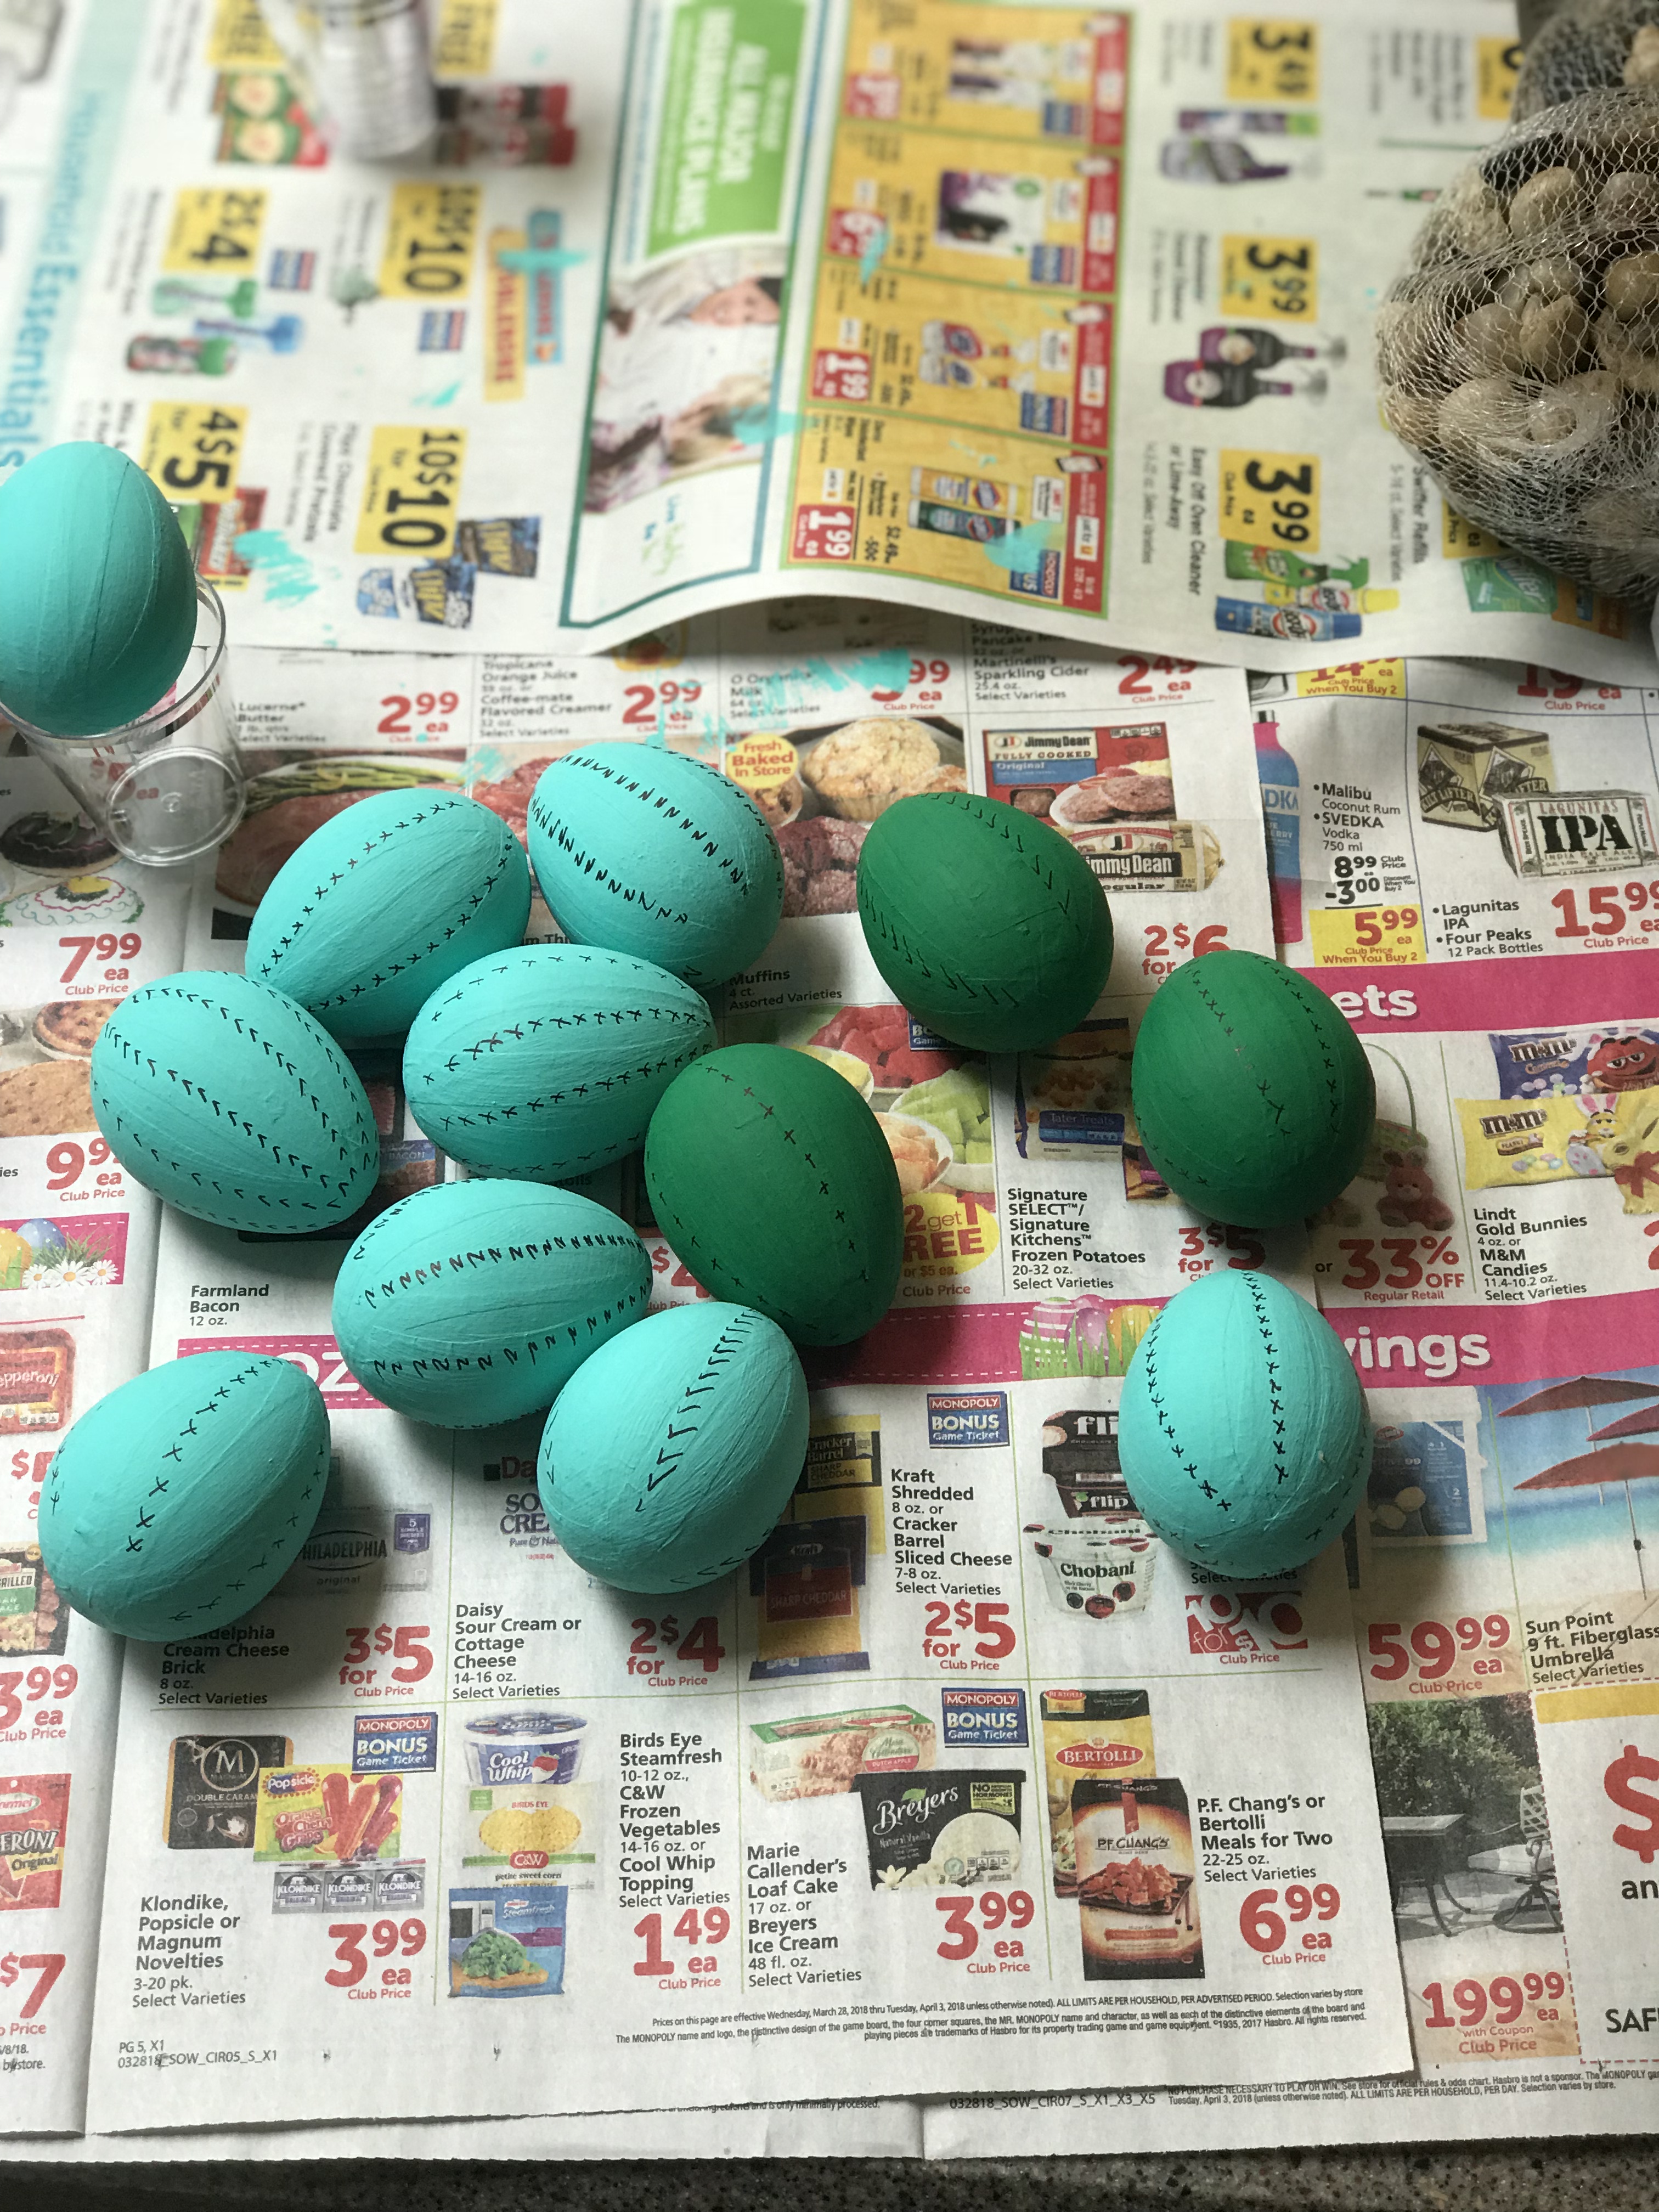
Next, I cut pieces of floral foam to fit in each pot, so that the top of the foam was slightly below the lip. I also trimmed the foam at the top so the top was narrower, making almost a pedestal for the egg. I wanted as little foam as possible to show after I added the rocks….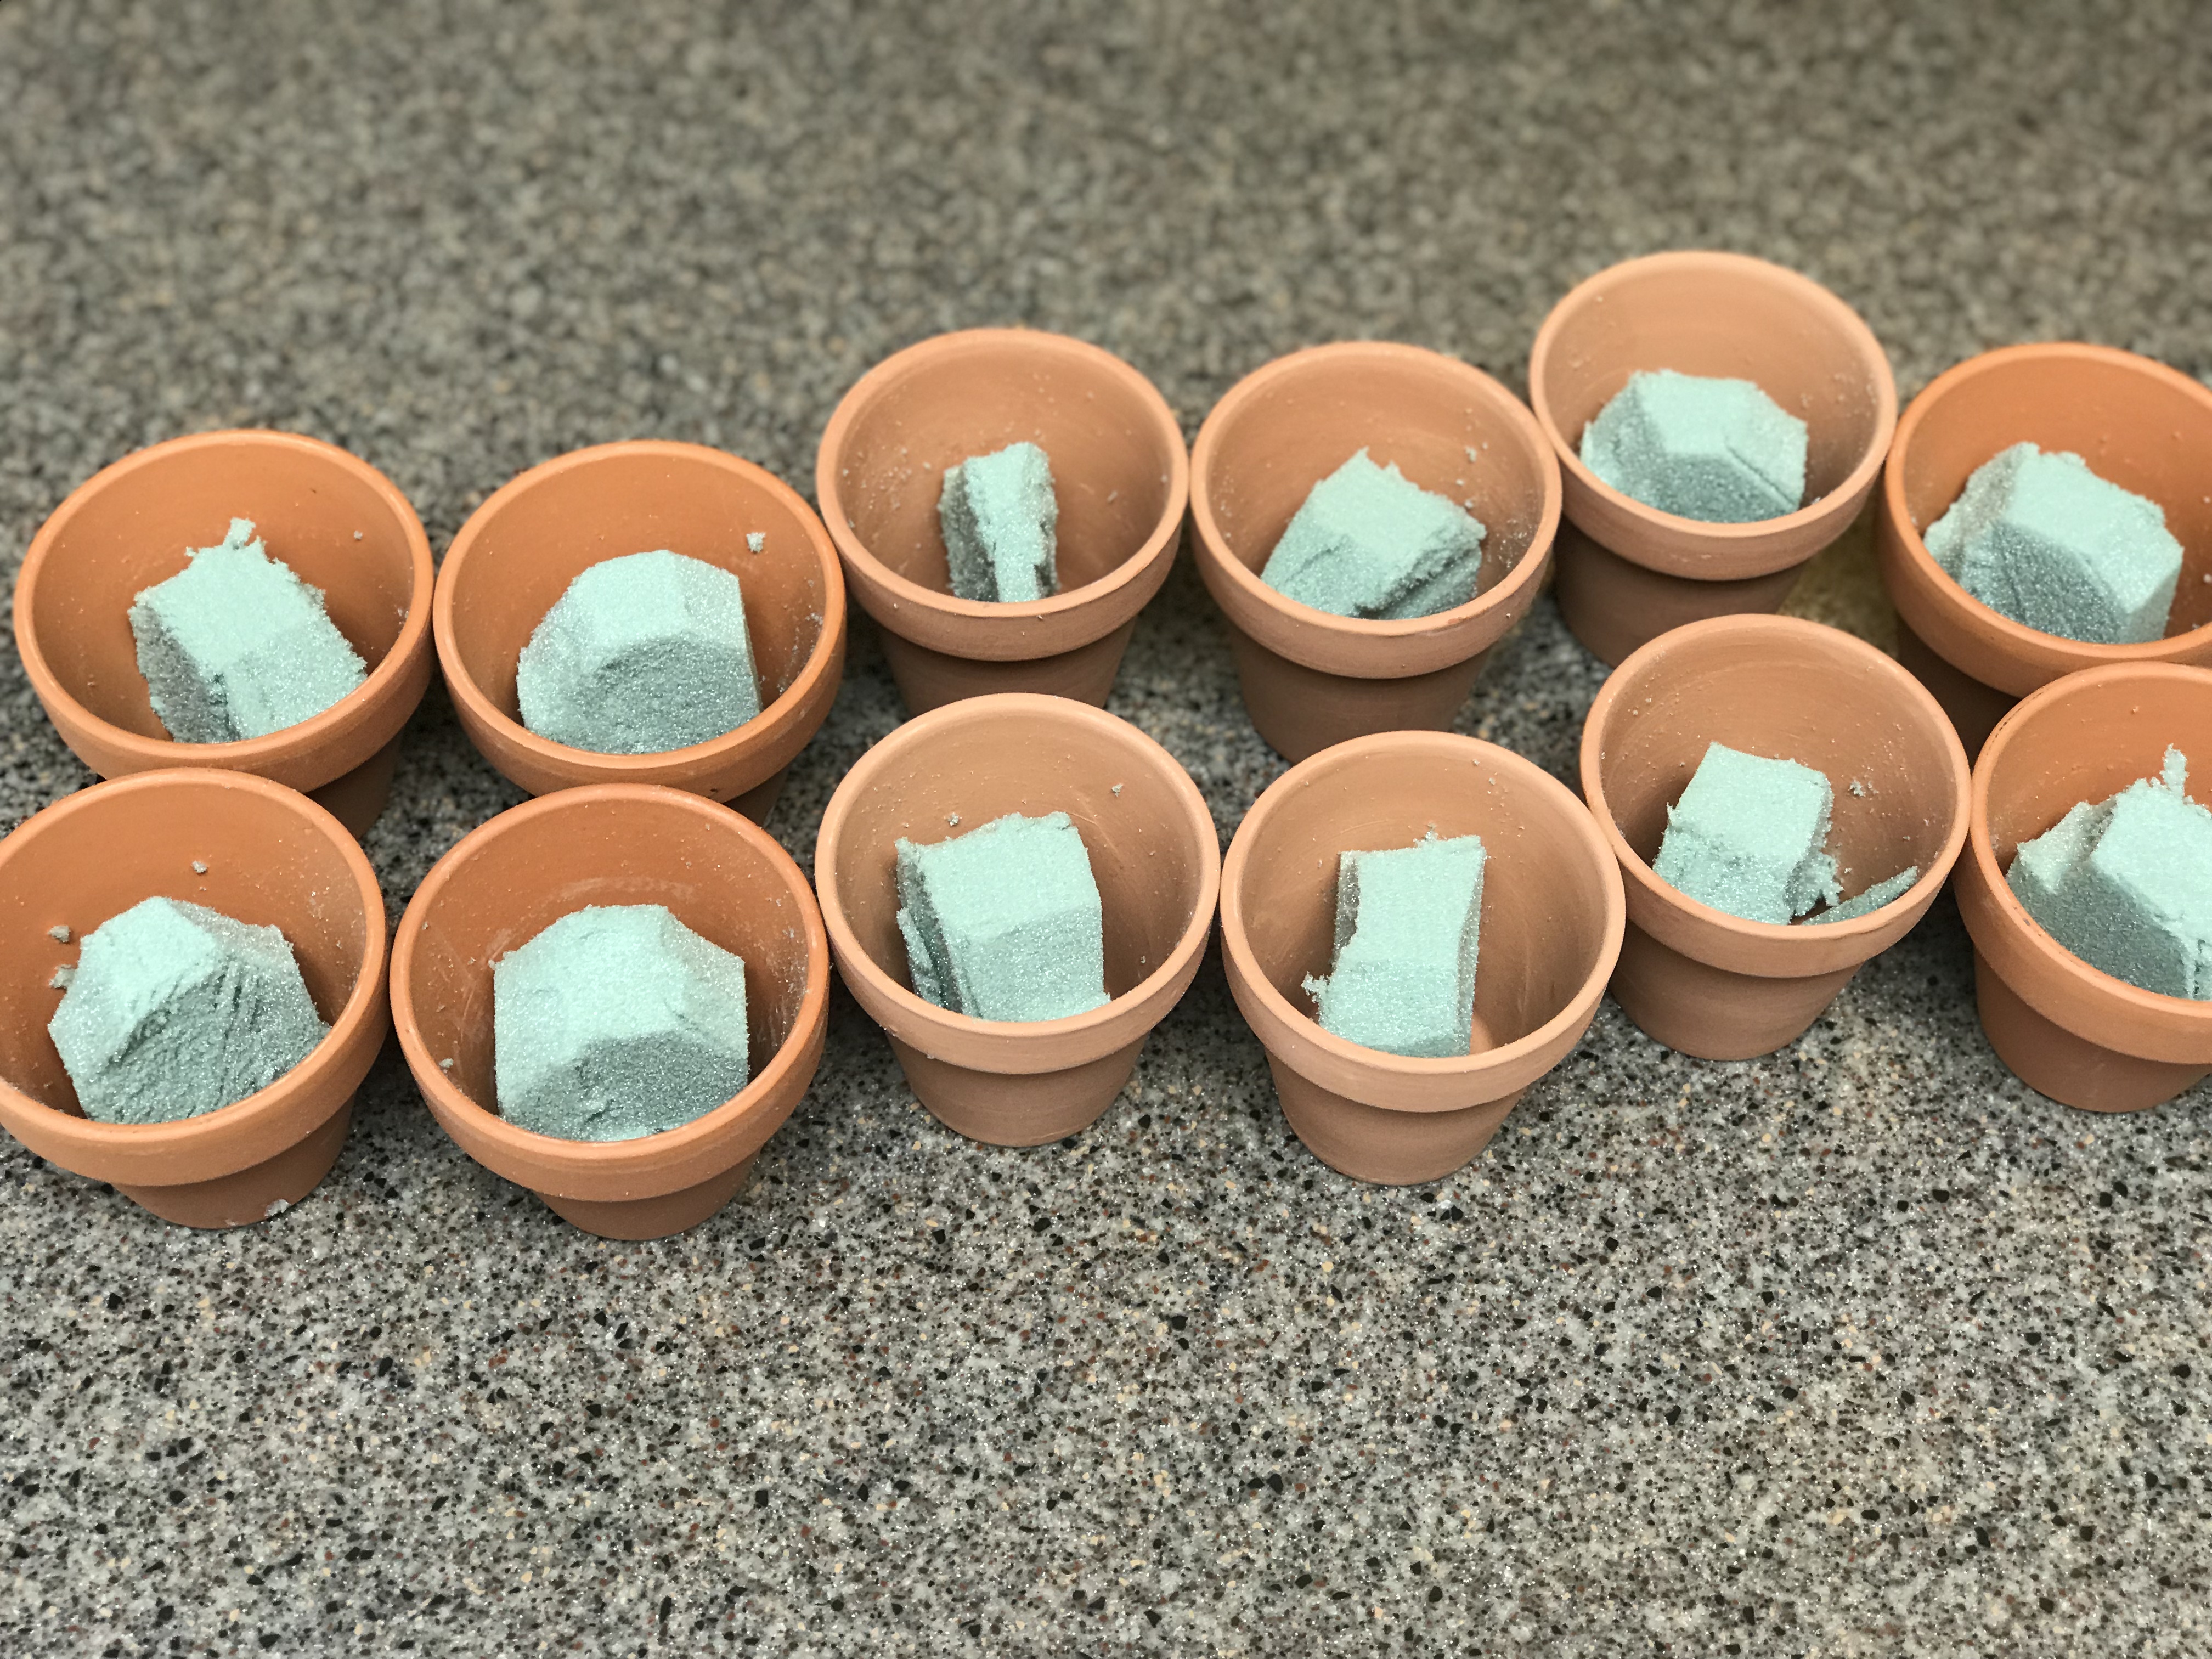
Then I put a glob of hot glue on the top of each foam piece and placed my egg on. Make sure you look from a few different angles to make sure the egg is straight from all sides. You’ll have a few seconds to adjust it before it dries. Also, in some of my pots, the foam wasn’t as tight as I liked so I dropped a little hot glue between the foam and the clay to secure it.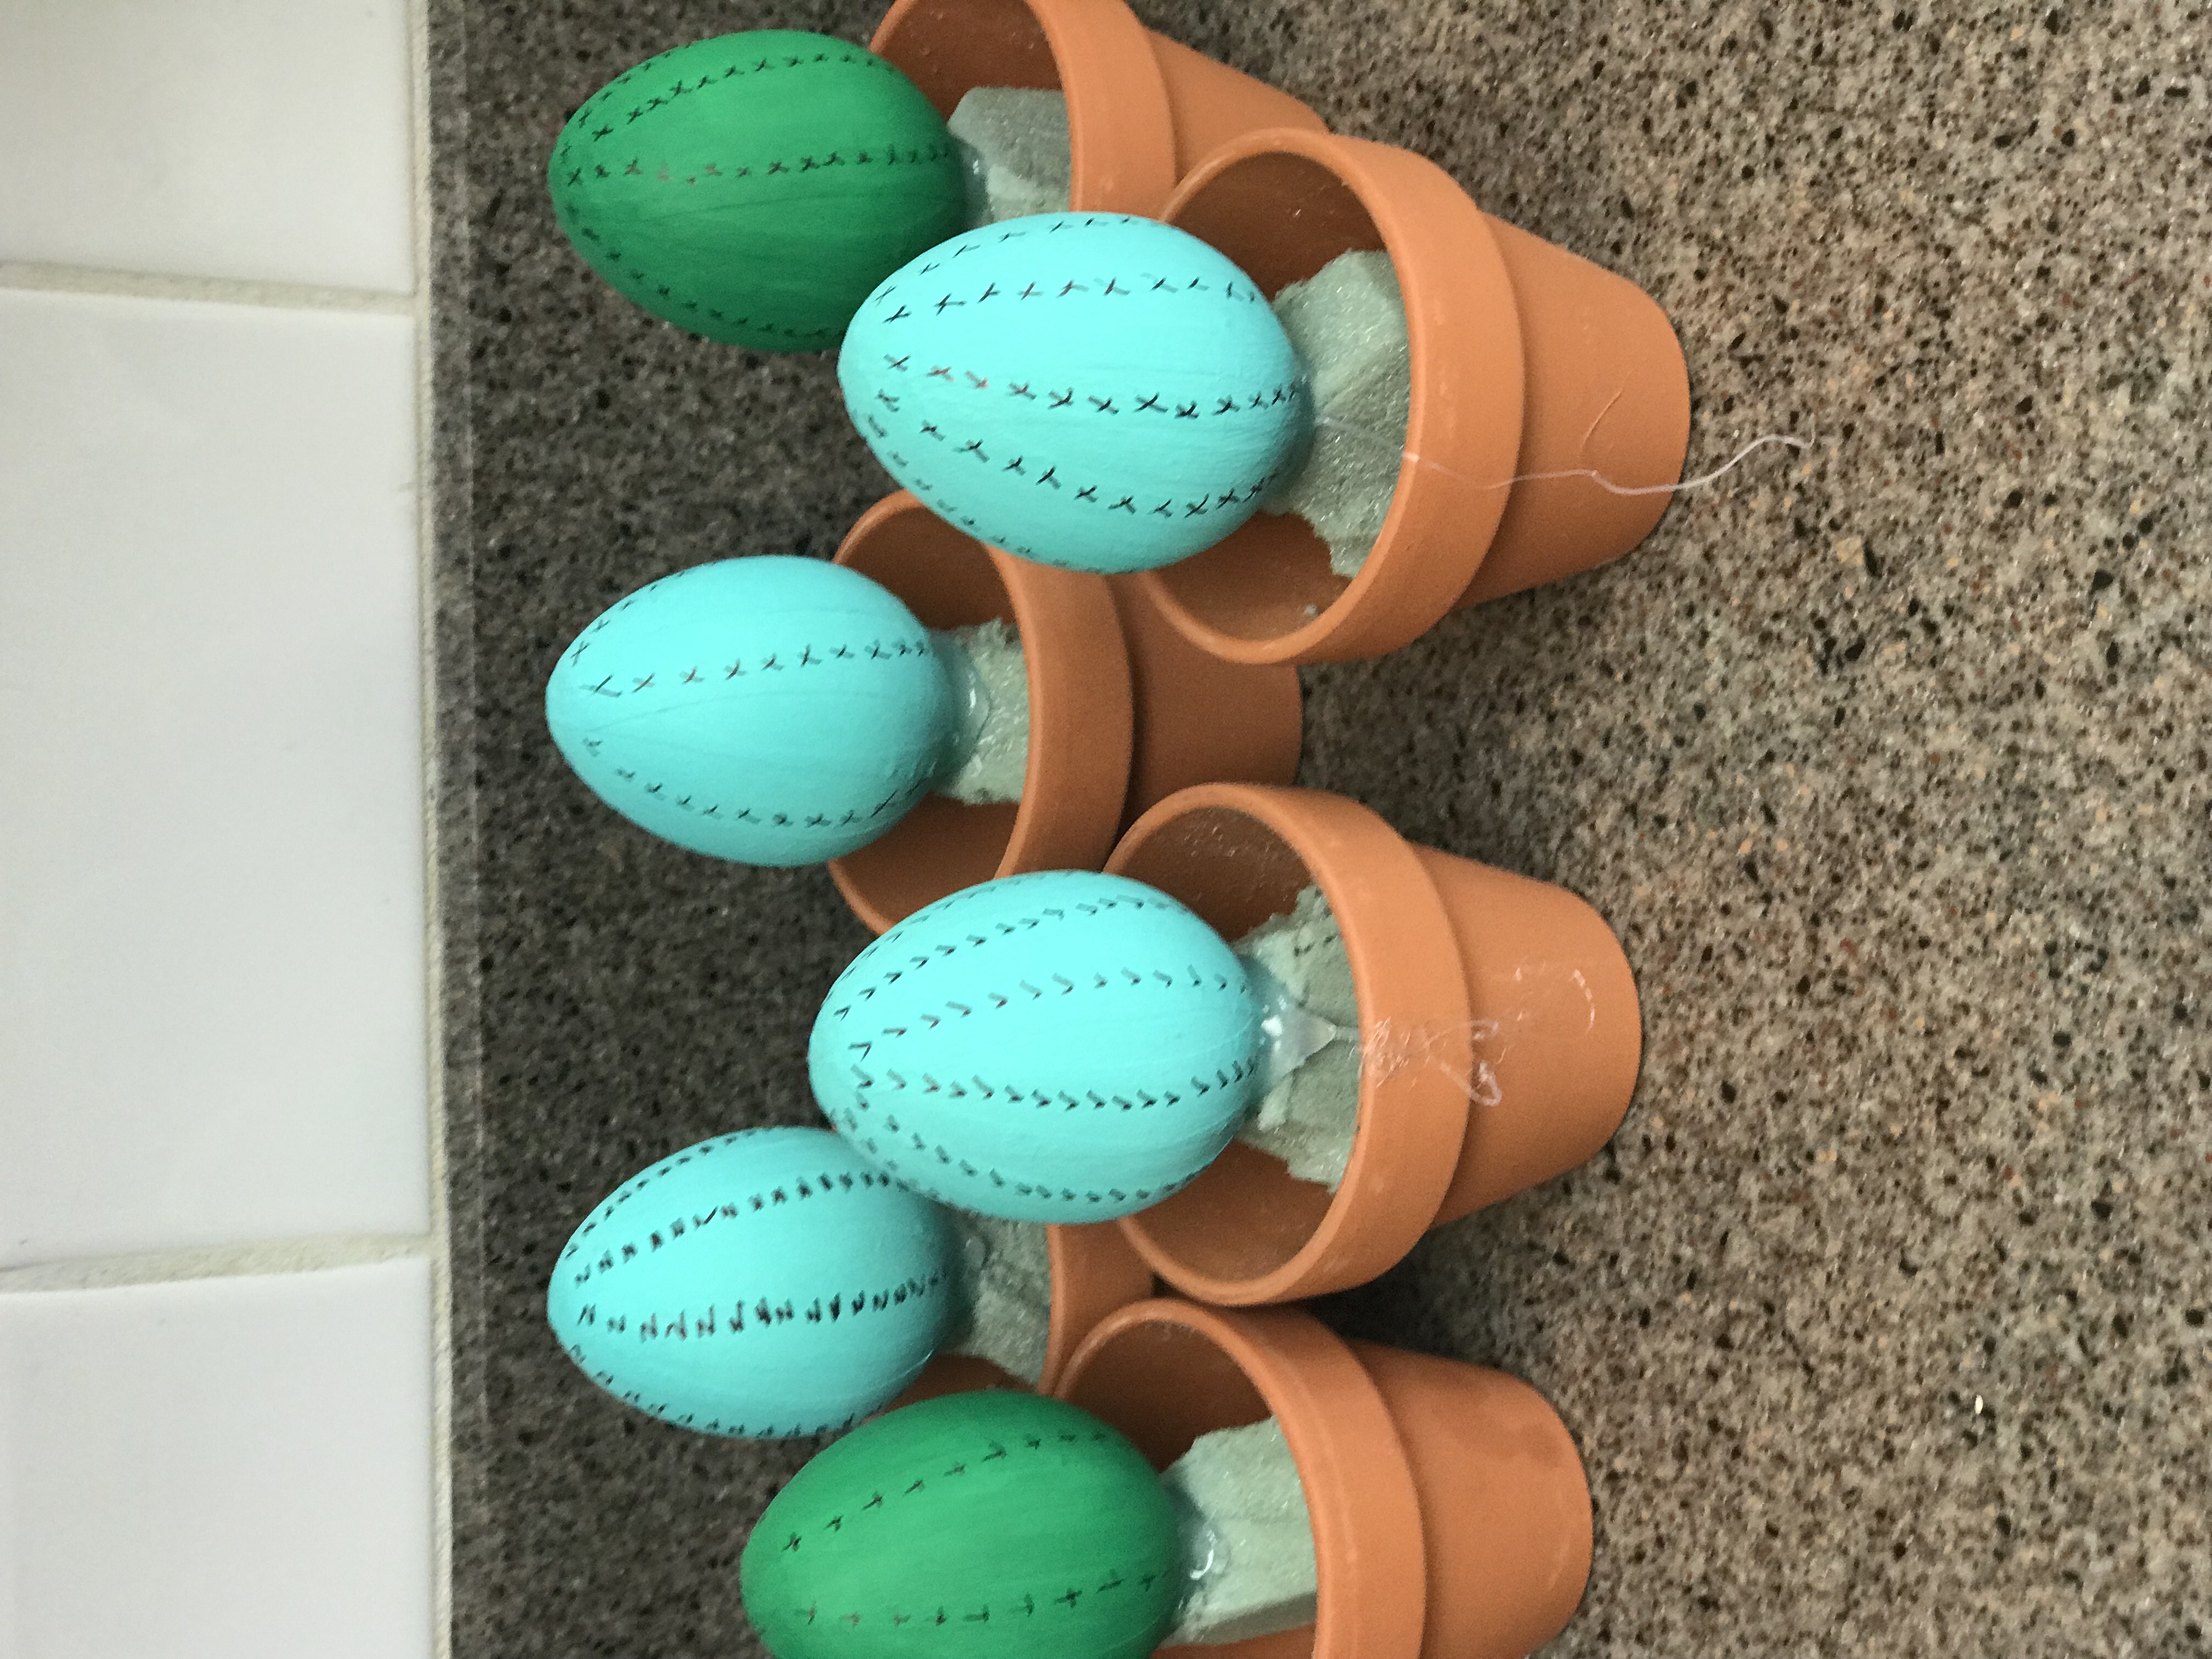
After all my eggs were secured, I began making my flowers. I folded a piece of light and dark pieces of tissue many times so I could cut a lot of circles at once. You can fold it into whatever shape you want, but I folded them into small rectangles about 2 inches long by 1-inch wide and then taped the edge so it would stay folded. Then I traced a dime onto the paper two times, and then cut around the trace lines. Once I had lots of circles, I began to glue. Definitely trial and error here, as it is easy to put too much glue on the circles. The ideal way was to squeeze a little glue on some newspaper and then just touch the tip of the gun in the center of the tissue circle so there was just a trace of glue left. Then I’d quickly layer another piece directly on top, and repeat until I had 8-10 pieces glued together. Once the glue dried, I crunched the edges together, trying to separate some layers too, making it look more like a flower. Once I got them to look how I wanted, I hot glued one to the top of each egg.
Finally, I filled each pot with rocks, being careful to cover the foam. Also some trial and error here, as you have to sometimes dig around for the perfect size rocks to fit in particular spots. 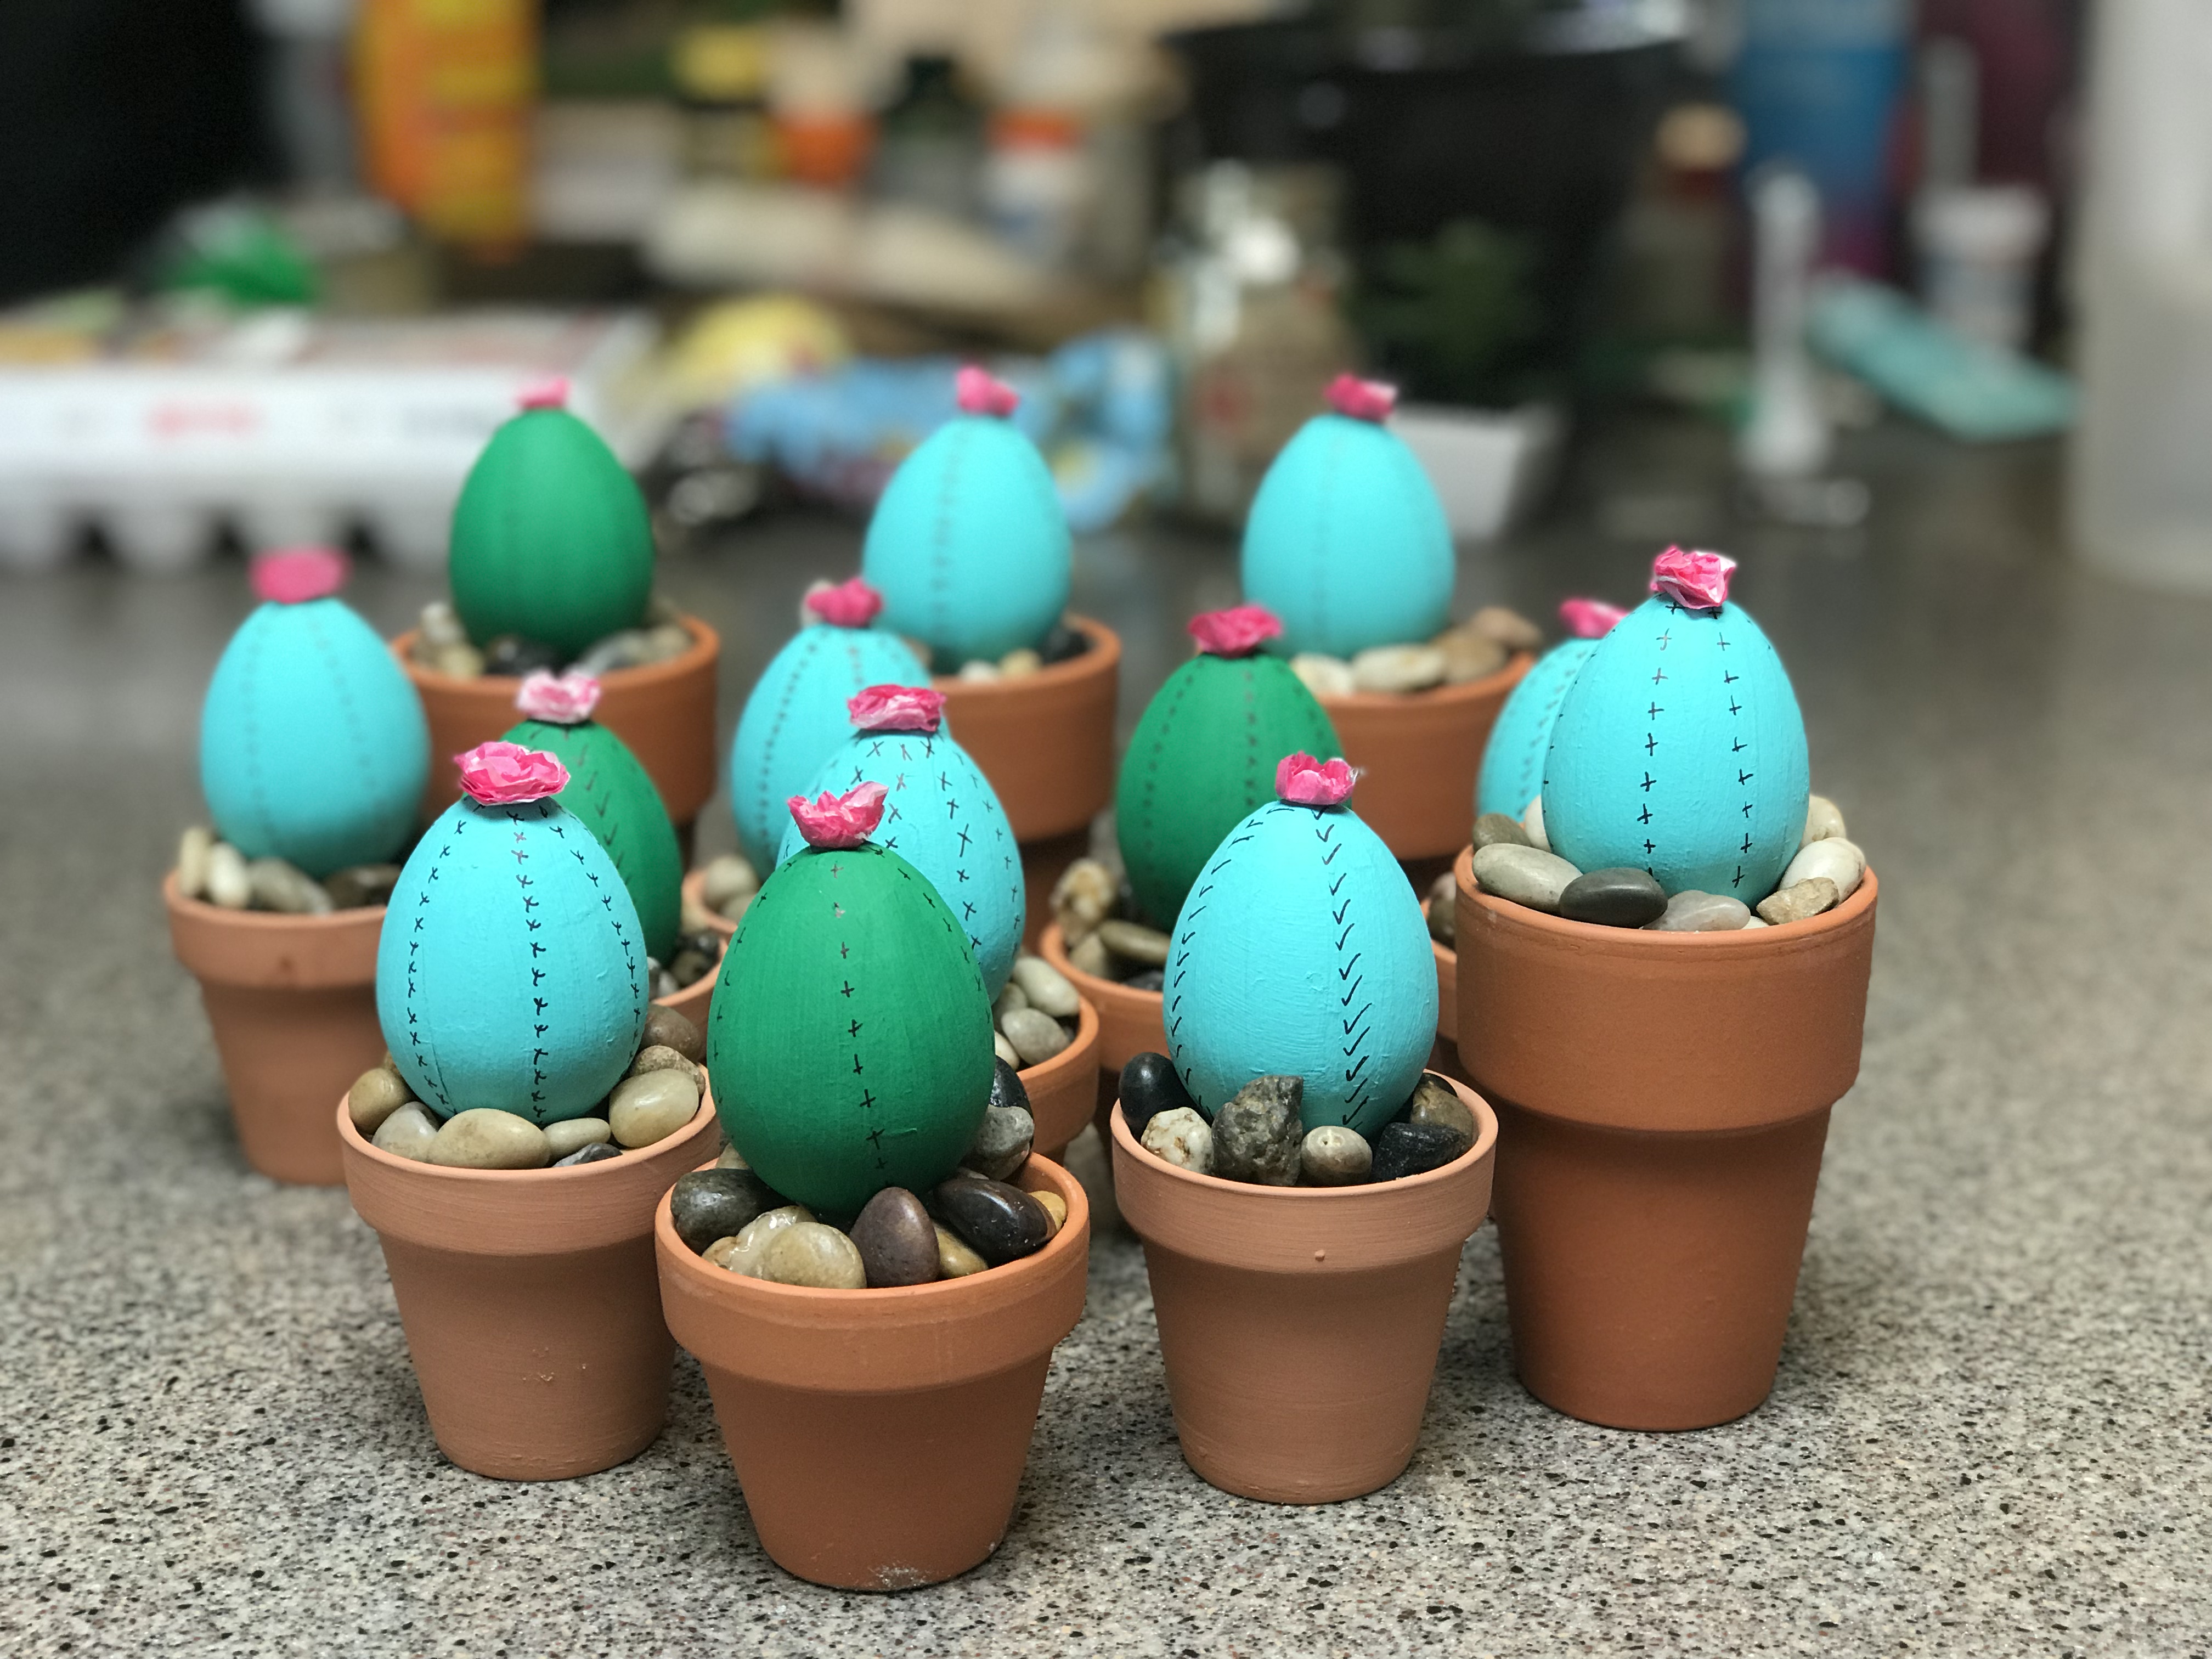
Well, what do you think?
They were a little labor intensive, but I think totally worth it! I am so glad I can keep them forever!
Happy crafting!
xo
132 comments for “DIY Egg Cactus Pots”